Showing posts with label stories. Show all posts

Wednesday, March 12, 2014

Fun with Leftovers


So, it's been well over a year since I have added anything to this blog.  Sigh.

I can't promise I will stick with it now, but I'm going to try.  I really miss this blog.  I refer to it all the time when I make my weekly meal plan.  So, without further ado, I shall jump right in.

I love left-overs.  I really do.  I try really hard to make food that will last a while when I cook.  Big pots of soup or stew are good.  Casserole-type things like lasagna are good.  Slow cooker meals.  That sort of thing.  That way, I don't have to cook as often.

Some things are really good left-over.  In fact, some things, like lasagna and jambalaya, are actually BETTER left-over because they sit in the fridge and get all happy, as Emeril would say.

But some things aren't that great left-over, like risotto.  Just re-heating it is always sort of disappointing.  

I made a big ol' batch of risotto for Sunday dinner last weekend.  I had to make something sort of soft, because I got my wisdom teeth out on Friday, and anything crunchy was still out of the question.  The recipe I used, which I will share in my next post, made enough risotto to feed my neighborhood, so I had to figure out how to make the Tuesday Night left-overs as good as the Sunday Dinner serving.  And, after looking around on the trusty internet, I mixed and matched some recipes and ended up making the risotto cakes in the picture above.

All I can say is Thank You, Trusty Internet!

First of all, Kev said my plating looked like restaurant food!  This PROVES that all these cooking competition reality shows I watch are good for something!  Unfortunately, Kev also has a pretty bad cold, and couldn't taste anything.  So you will just have to take my word for it...these risotto cakes were GOOD!  Daphne even liked them!

And to make them even better, I used left-over pasta sauce from Monday night.  Kev calls this "food synergy."  It's a way of making different things in the meal plan work together.  He should really write a book.

Anyway, here is how I did the risotto cakes (the sauce recipe is elsewhere on this blog in a post called Time to Make Sauce, but any good tomato or marinara sauce will do.  Trader Joe's pizza sauce is good).  

RISOTTO CAKES

Ingredients:

Leftover risotto (that has been in the fridge at least overnight)
flour
eggs (1 or 2, depending on how much risotto you have)
bread crumbs
seasoning herbs and spices of your choice
olive oil

tomato sauce or marinara
parmesan cheese

Directions:

1.  (Do this 4 to 24 hours ahead of time) Take a small hand full of the cold risotto and form a patty, maybe the size of a hockey puck.  (Your risotto should stick together easily, but if it is falling apart, you can add an egg and mix it in to bind the rice.  I didn't need to do that because mine was really sticky).

2.  After you have formed all your patties, it's time to bread them.  You need three shallow bowls:  one with flour, one with a beaten egg (or 2 if you have a lot of risotto), and one with bread crumbs.  I usually add a little water to the egg to thin it out.  You can season all three with salt and pepper or Italian seasoning, or whatever you like, and that you think will compliment your risotto.  For example, a little sage would be nice with butternut squash risotto.  Basil and oregano with parmesan or mushroom risotto.

3.  Dredge the patties to coat in the flour (shake off excess), then the egg, then the bread crumbs, and place on a platter or dish.  After all your patties are breaded, cover with plastic and chill in the fridge for a few hours.  This will help the breading stay on and the patty to hold together during cooking.

4.  When you're ready to cook, heat your oven to 350 and remove the risotto cakes from the fridge.  Add a tablespoon or two of olive oil to a nonstick skillet, and when it's pretty hot but not smoking, cook the patties until golden on each side, flipping once.  Don't crowd the pan...do it in batches.  I did three at a time.  Put the finished ones on a parchment-lined cookie sheet in the oven to keep them warm until it's time for the best part - EATING them!

5.  Serve on a plate on top of warm tomato sauce, and topped with freshly grated parmesan cheese.

Left-overs are awesome!

Tuesday, January 15, 2013

All Day Happy Cake


So, I'm in a book group.  I never really thought I'd be in a book group, but I am and I love it.  Being in a book group forces me to read more and to socialize with people I like.  Good things.  This month, it was my turn to host, and our meeting was last night.  Our assignment was to read The Happiness Project by Gretchen Rubin.  I had already read the book.  Twice.  I'm sure I even blogged about it.  It's a pretty good book.  There is a certain amount of obviousness and fluff, but it's good for people like me who need to be reminded that going on quiet log cabin-y vacations or eating lots of chocolate foods are not the only paths to happiness.  Being in a book group definitely makes me happy.

The book in the above photo is not a book group book, but a Christmas gift from Kev, who knows just exactly the kinds of things I like.  You should see all the photos in this book.  Total eye candy (or eye cake, I guess you could say) for people like me.  Very Anthropologie.  Since Christmas, I have been wanting to make one of the cakes from the book, and hosting the book group gave me the perfect excuse to do it.

There was great internal debate in the morning.  There were about a million other things I should have been doing.  Plus, it was laundry day, grocery shopping day, and I had an eye doctor appointment at 2:10.  Plus, the back part of the house really needed a good tidy-up, especially since guests were coming over.  But then I decided that this was the Happiness Project meeting, and baking a cake was a much happier endeavor than cleaning the back rooms, and that if I was organized and stopped sitting around fretting about the grocery store and just WENT to the grocery store, I could still have plenty of time for the cake and the laundry, and besides, the people in my book group aren't the kind of people who look down their noses at a messy playroom and would probably prefer that I bake them a cake anyway!  Decision made!

I got home from Wegmans, put on the Mumford and Sons Pandora station (there is almost never a thumbs down song on that station), and got to work on the custard.  Making custard seems scary, but it isn't.  It's actually really kind of fun.  Then, I figured I had JUST enough time to bake the cake before my eye doctor appointment.  And I did.  I pulled the cake out of the oven to cool, and ran out the door.  I made it with 5 minutes to spare.


When I got back, it was time to remove the cake from the pan to cool a little more, so I did that just in time to get outside and meet Daphne's bus.  Once I got her going on homework, I frosted the cake with the custard.  So pretty!!!


 Then, I put it in the fridge to set up.  Daphne and I might have eaten the extra custard.

An hour before book group, I took the cake out of the fridge to come to room temperature.  I put it on a cake stand, which made me happy; served it on my grandma's plates, which made me happy; and we used the nice crystal glasses that my parents gave us for our wedding, which also made me happy. 


The cake itself was really good.  Especially the cake part.  Really super moist and a nice flavor from the almond paste.  The custard was good too, but Kev and I both thought maybe the cake and custard were better separately than together.  They didn't seem to match.  Personally, I think this cake would have been better with a nice chocolate ganache, or maybe even just some vanilla whipped cream.  But Kev, who doesn't like cake, said the CAKE part was probably the best cake he's ever had.  And the book group seemed to enjoy it...their plates were clean.

The cake took all day to make, but I was happy that I decided to do it.  Looking forward to the next one.  I think I'll make the Goober Cake for my dad's birthday, so stay tuned for that!

Lemon and Almond Streamliner Cake
From Vintage Cakes, by Julie Richardson

Ingredients


Custard:
  • Grated zest of 2 lemons
  • 3/4 cup whole milk
  • 1/2 cup (3 1/2 ounces) sugar
  • 4 egg yolks
  • 1/2 tsp. fine sea salt
  • 2 Tbsp. cornstarch
  • 1/2 cup lemon juice (from approximately 3 lemons)
  • 1/2 cup (4 ounces) unsalted butter, cut into small cubes
Cake:
  • 1 1/4 cups (5 ounces) sifted cake flour
  • 1 1/2 tsp. baking powder
  • 1/2 tsp. sea salt
  • 3/4 cup (6 ounces) almond paste, ' 'at room temperature
  • 10 Tbsp. (5 ounces) unsalted butter, at room temperature
  • 2/3 cup (4 2/3 ounces) sugar
  • 3 Tbsp. canola oil
  • 2 tsp. pure vanilla extract
  • 3 eggs, at room temperature
  • 2/3 cup buttermilk, at room temperature

Directions


To make the lemon custard, combine the lemon zest, milk, and 1/4 cup of the sugar in a medium saucepan and heat over medium-low heat until just hot. Meanwhile, in a bowl, thoroughly whisk together the egg yolks, the remaining 1/4 cup of sugar, and the salt until well combined, then whisk in the cornstarch, then the lemon juice. Slowly whisk a third of the hot liquid into the yolk mixture. Pour the mixture back into the saucepan with the hot milk and cook over medium-low heat, whisking steadily, until the custard begins to thicken and bubble for 1 minute (you will need to stop whisking for a moment to check if it is bubbling). Strain the custard through a fine mesh sieve into a clean bowl and whisk in the butter until it has melted. Place a piece of plastic wrap directly upon the surface of the custard and place in the refrigerator to cool for about 2 hours. The custard is easiest to work with once it has set.

Center an oven rack and preheat the oven to 350°F; grease a 9- x 2-inch round cake pan and line the bottom with a parchment paper circle.

To make the cake, sift together the flour, baking powder, and salt in a bowl, then whisk the mixture to ensure that the ingredients are well mixed.

Using a stand mixer with the paddle attachment, combine the almond paste, butter, sugar, canola oil, and vanilla on low speed until blended; gradually increase the speed to high and cream until very light and fluffy, 5 to 7 minutes, stopping the mixer frequently to scrape the paddle and the sides of the bowl with a rubber spatula. Blend in the eggs one at a time, adding the next one as soon as the previous one has disappeared into the batter. With the mixer on low speed, add the flour mixture in three parts, alternating with the buttermilk in two parts, beginning and ending with the flour. After each addition, mix until just barely blended and stop and scrape the bowl. Stop the mixer before the last of the flour has been incorporated and complete the blending by hand with a rubber spatula to ensure you do not overbeat the batter.

Pour the batter into the prepared pan and spread it evenly. Rap the pan firmly on the counter to release any air bubbles. Place the pan in the center of the oven and bake until the cake is a deep golden color and a wooden skewer poked in the middle comes out just barely clean, 42 to 45 minutes. The cake might crack on the surface as it bakes; don't worry, this simply provides a way for the cake to soak up more of the lemon custard. Cool the cake in its pan on a wire rack for 30 minutes. Gently invert the cake onto the rack, leaving on the parchment paper until you assemble the cake. Flip the cake right side up and continue to cool the cake on the rack until it reaches room temperature.

To finish the cake, remove the parchment paper and place the cake right side up on a flat plate. Using a metal spatula, spread a thin layer of the lemon custard on the sides of the cake to seal the cake and give it a light shine. Put the rest of the lemon custard on top of the cake, spreading it just barely out to the edge. Use your spatula to make a swirly design in the custard on the top of the cake. Allow the assembled cake (or really, the lemon custard) to set in the refrigerator for 30 minutes.

Bring the cake to room temperature before serving (this will take about an hour). Any leftover cake keeps in an airtight container in the refrigerator for up to 3 days.

Friday, January 11, 2013

Sticky Business


I had always wanted to try making marshmallows, but never had the guts.   Then, my friend Jill told me a story about how she and a friend used to make them every year, but stopped doing it, and how she wanted to make some again,  but didn't want to do it by herself because it's kind of a big production.

A new tradition was born. 

Voila!  Marshmallows 2012!


She was right.  It IS a big production.  We were swirling around that kitchen like crazy people.  But it was really fun, and the marshmallows are pretty amazing.  So much better than the ones in the grocery store.  We made peppermint ones.  I have tons of them still, in the freezer, ready to pop into hot chocolate any time I want.

I roasted one over the flame on my stove the other day.  It was awesome.  There will be a mint chocolate s'more in my future.

So, thanks to Martha Stewart for this recipe, and thanks to my friend Jill for letting me come over for a day of marshmallow-making fun.  I think we should do another batch in the spring before we take the Daisies camping. All the other troops will be jealous.  Maybe we can even make homemade graham crackers too.  Because we are THAT mom. 


Martha Stewart Candy Cane Marshmallows

Ingredients

  • Vegetable-oil cooking spray
  • 2 cups sugar
  • 1 tablespoon light corn syrup
  • 4 packages (1/4 ounce each) unflavored gelatin
  • 3/4 teaspoon peppermint extract
  • 2 large egg whites
  • 2 teaspoons red food coloring

Directions

  1. Coat an 8-inch square pan with cooking spray; line bottom with parchment paper. Coat the parchment with cooking spray, and set pan aside. Put sugar, corn syrup, and 3/4 cup water in a small saucepan. Cook over medium heat, stirring, until sugar is dissolved. Stop stirring; let mixture come to a boil. Raise heat to medium-high; cook until mixture registers 260 degrees on a candy thermometer.
  2. Meanwhile, sprinkle gelatin over 3/4 cup water in a heatproof bowl; let stand 5 minutes to soften. Set the bowl with the gelatin mixture over a pan of simmering water; whisk constantly until gelatin is dissolved. Remove from heat, and stir in extract; set aside.
  3. Beat egg whites in the bowl of an electric
    mixer fitted with the whisk attachment
    until stiff (but not dry) peaks form.
    Whisk gelatin mixture into sugar mixture;
    with mixer running, gradually add
    to egg whites. Mix on high speed until
    very thick, 12 to 15 minutes.
  4. Pour mixture into lined pan. Working quickly, drop dots of red food coloring across surface of marshmallow. Using a toothpick, swirl food coloring into marshmallow to create a marbleized effect. Let marshmallow stand, uncovered, at room temperature until firm, at least 3 hours or overnight. Cut into squares.

Monday, January 7, 2013

Eating our Curds and Whey


One way to slow things down, if that is what you're trying to do, is to make your own cheese. I got this kit from Kev for Christmas, and couldn't wait to try it, so on Friday, I went to the health food store and got some organic pasteurized (but not ULTRA-pasteurized) milk, and on Saturday, we made homemade ricotta.

The process was simple.  You just add a little water and citric acid to the milk, add some cheese salt (note to self - find out how (if) cheese salt is different than regular salt), and heat up the milk slowly until the curds separate from the whey. (There are tons of recipes on line if you don't have a kit).

Curds and Whey
Then, you pour it in a cheese cloth to drain out the whey, and you are left with a beautiful, delicious ball of ricotta cheese.


Which can then be made into a beautiful and delicious lasagna:

Heck yeah.
We had the lasagna last night for Sunday Dinner.  One of the few "jobs" that Daphne doesn't complain about is setting the table.  She really loves doing it.  So, last night, I asked her if she could get the table ready by passing out napkins and forks (she was extra happy to do this because she got me some pretty napkin rings for Christmas).  Kev had to go in to work for a little while yesterday, and had just gotten home and gone upstairs to shower while we got dinner on the table.  Suddenly,  Daphne dashed into the kitchen and asked if she could be the waitress.  "Um...OK,"  I said.  She switched into high gear.

"Mom!  Can you make me a menu?!  Mom!  Do we have any vases?!"

She put on an apron and got down to business.  I helped her make a menu (Daphne won't eat cheese, so I made her a separate little dish without it):


I helped her make a fancy centerpiece.  She remembered that she had a small jar of roses from a recent birthday tea party she attended, and we put to use my crafty bottle candle holders.  She put the seashell on because she said, "It will make me feel calm if I get nervous."


When Kevin came downstairs, to his surprise she welcomed him to the "restaurant," and led him to the table to look over the menu.  I sat down, and she asked us if we'd like to start with something to drink.  She was so professional!


Then she took our orders.  Kev was "Coustamar 1."  She even used short-hand...see the little arrows?  That was to show that we were splitting the Side of Grapes.  It was so dang cute and funny.  She would hurry into the kitchen, bring our food and drinks, then go back to the kitchen, take off the apron, and re-appear as Daphne.  When we needed the waitress, she would excuse herself to go to the restroom, go back into the kitchen, and put on the apron again.  It was like eating dinner with Clark Kent.  At the end of the meal, she disappeared into the kitchen again.  We heard scribbling, and she returned with the check (25 $)!  Kev handed over his credit card and gave her a $1.00 tip.  Best meal we've had in a LONG time.


The cheese we made was honestly really really delicious.  So fresh.  We had some on a cracker with a little bit of raspberry jam just to try it out and MAN it was good.  We have quite a bit left, so tonight for dinner we're having lemon ricotta pancakes. I'll let you know how they turn out.  Tomorrow, we're going back to that restaurant for some left-over lasagna.  Can't wait for that. 

Wednesday, October 10, 2012

Whatever Floats Your Boat


Here's a trick.  If you are making baked potatoes, and you think your kid will probably say things like "yuck" and "I don't like baked potatoes," then tell them you are very excited because it is Potato Boat Night.  And tell them they can put whatever they want in their potato boat, like salt, peas (?), and leftover pork ragu, and that melty cheese is completely optional.  They might just get all excited and, in the spirit of Potato Boat Night, make toothpick sails for the potato boats, and then eat the whole thing with no complaining. 

I know I promised a chicken trifecta.  I will get to it soon.

Wednesday, September 19, 2012

PIE!


My friend Emily has a good job with a lot of perks, but unfortunately, it isn't really doing a lot for her soul.  Let's face it.  Not many of us have jobs that do anything for our souls.  Those jobs are hard to find.  Emily does have some hobbies, however, that are GREAT for her soul.  Running, knitting, reading, and making pie.  She is especially good at making pie.  Like State Fair of Texas Blue Ribbon Winning good.  Winning a blue ribbon at the State Fair of Texas is HUGE.  Those Texas ladies are serious about their pie, and she showed them how it's done.

Emily has decided to write a pie book.  For her soul.  I am 100% in favor of this.  And because I am her friend, I have already read the first couple of chapters (which are great) PLUS I got to be a recipe tester for this Nutella Buttermilk Pie.  Yesterday, I cleaned the glass on my oven door.  Since you could actually see through it for the first time in four years, I thought there needed to be something in there worth looking at.  So, it was the perfect day for pie recipe testing.


After I put the pie in the oven, I saw this guy on my kitchen floor.  Apparently, he heard there was going to be pie.  With Nutella.  Who can resist that?  You can't tell, but he is HUGE and scary.  I covered him with a tupperware container and tried to ignore him.  Ugh. Let's get back to the pie.


TA-DA!


Isn't it pretty?  And it tastes really good, too.  Daphne was running around the house singing, "Awesome, awesome...awesome, awesome...awesome, awesome... "


I'm sorry to say I can't post the recipe.  You will just have to wait and buy the book.  But, you will totally be glad you did.  I'll let you know when it's at an Amazon near you.

Friday, June 1, 2012

Birthday Pie

Over the weekend, we hosted Daphne's sixth birthday party.  She decided on a Texas/Cowgirl theme, and I was struggling with what to put on the cupcakes I usually make for birthday parties.  (I always opt for cupcakes instead of one big cake because of the potential germs and/or spit generated from little kids blowing out the candles.  Yuck.  You may feel free to make fun of me now for being germophobic.  It's just how I am.  Don't even get me started on library books...). Anyway, as a little side treat to go along with the theme,  I was planning to make these s'mores pops that I saw on pinterest:


                                                                           Source: prettyfoods.tumblr.com via Tara on Pinterest


And then I got an idea.  Why not just make the s'mores into little pies, and have S'mores Birthday Pie instead of cupcakes!  Clever, huh?  Perhaps I should go on Sweet Genius!  Cupcake problem solved.

So, I searched my cookbooks and the internet for a good chocolate pie filling, and ended up choosing a NY Times recipe for Chocolate Hazelnut Panna Cotta.  Because it is mostly Nutella.  I made the filling, put it in mini graham cracker shells, and later topped it with mini marshmallows, which I toasted with my kitchen torch.  The recipe made 15 mini pies and two small ramekins of panna cotta for Kev and I to enjoy later.  Which we did.  This stuff was GOOD.  Not overly sweet, very creamy.  Yum.

I bought Daphne a sparkler candle shaped into a six because I thought it would be fun.  It wouldn't stand up in the pie filling, so I anchored it in a jumbo marshmallow:


Then, I forgot to warn her that it was going to explode into sparkly flames, so when it lit, she ran away in fear and I couldn't get a photo of her with her pie.  (The table did not catch on fire, by the way).  It was a pretty exciting birthday moment.


Anyway, I highly recommend this panna cotta recipe.  It really is good, and it's easy because you don't have to bother with eggs.  It does take a while to set, though.  It never really firmed up...it was the consistency of jell-o pudding.  Only it was better.  Because it was made out of Nutella.  NUTELLA!  Recipe here and  below:

Milk Chocolate Hazelnut Panna Cotta

Adapted from “The Craft of Baking,” by Karen DeMasco (Clarkson Potter, 2009)

Time: 20 minutes, plus at least 6 hours’ chilling


1 1/8 teaspoon powdered gelatin
2 ounces bittersweet chocolate, finely chopped
1 cup Nutella
1/2 teaspoon kosher salt
1 1/2 cups heavy cream
1/2 teaspoon vanilla extract
1 cup whole milk
1/4 cup chopped, toasted hazelnuts, for serving (optional).

1. In a medium bowl, whisk gelatin with 3 tablespoons cold water. Place chopped chocolate in another medium bowl. In a large bowl, combine Nutella and salt.
2. In a small saucepan over medium heat, bring cream to a boil. Pour half the cream over gelatin mixture and whisk gently to combine; stir in vanilla. Pour remaining cream over chopped chocolate; whisk until smooth. Combine two mixtures; whisk well.
3. Pour one-third of the gelatin-chocolate mixture over Nutella; beat using an electric mixer on low speed until a smooth paste forms. Pour in remaining mixture and milk; beat until fully combined.
4. Strain through a fine-mesh sieve into six ramekins. Cover loosely with plastic wrap and chill in refrigerator until set, about six hours or overnight. Serve sprinkled with chopped hazelnuts, if desired.
Yield: 6 servings.

Wednesday, April 18, 2012

Cooking Light


Well, Spring is here.  And, for me, this presents some mealtime challenges.  Because as you can probably tell from the contents of this blog so far, I like cooking big pots of warm comforting wintery things.   I am a fan of soups and stews and heavy pasta dishes.  I am not crazy about cold meals and salads and crisp raw vegetables.  But, I am determined this year to find some new lighter easy meals for warmer weather.  And I am going to try to take advantage of things we have in the garden or can buy in season at the farmer's market. 

We started yesterday by making a nice light springtime pasta:  Linguini with a mushroom lemon basil sauce.  It was really easy, and it turned out great.  But when I decided to make it, I had a feeling Daphne would refuse to try it, because she has turned against mushrooms, which she used to love.  I had to be strategic. So I went into the playroom looking exasperated, and asked her if she knew anything about zesting lemons, and telling her I needed help inventing dinner.  Inventing was the magic word - Daphne loves inventing -so we got right to work.


Before we started cooking, I let Daphne play around with the ingredients a little.  I sent her out to get some basil leaves, and had her invent a "Daphne Sample."  (Daphne Samples are little one-bite things she likes to put together with various ingredients we happen to have at mealtime.  She wants to sell them someday at something like a lemonade stand as her "business.")  She jumped at the chance.  First, she just put some salt on some raw mushroom slices and ate those.  She liked them!  Then, she decided to get fancy, and rolled up a mushroom slice and grape tomato in a basil leaf with a little salt.  She was about to eat it, but Kev came home so she gave it to him.  But that's OK...by then, she was TOTALLY into cooking this meal.

Here she is, finishing the sauce with a little fresh basil.  That's my girl!


We had to serve this meal three ways.  Kev's dish had the works.  Mine had no tomatoes but lots of parmesan, and Daphne's had no tomatoes or cheese.  But it worked out nicely, everyone liked it, and we'll definitely make it again.  And it was VERY springy!


Linguini with Mushroom Lemon Basil Sauce
 Ingredients:
Linguini noodles (I used Wegman's fresh pasta)
1 stick of butter
2 cloves of garlic, minced
10-12 large button mushrooms, sliced
salt
1/2 cup white wine
3-4 Tbsp lemon juice
fresh basil
lemon zest
parmesan cheese
grape or cherry tomatoes

For the sauce:
Melt the butter is a large saute pan.  Add the garlic and mushrooms (and salt) and cook until softened, about 10 minutes.  Add the white wine and gently simmer the sauce to reduce.  Meanwhile, boil some water for the linguini, add salt, and cook the pasta.  When the pasta is almost done, reduce the heat on the saute pan and add the lemon juice to the sauce, tasting as you go to make sure it isn't TOO lemony.   Reserve some pasta water, drain the pasta, and toss it into the sauce.  Add a little pasta water to bring it all together (maybe 1/3 cup).  Add a little bit of lemon zest and fresh basil (we just tore it into small pieces and dropped it in), and toss.  Serve with parmesan cheese and tomatoes if you like.  Yum!


As Kev said, this would be good with shrimp.  Maybe next time!
  

Monday, April 16, 2012

Dear Ricotta Cheese,

I am so sorry that I misjudged you all these years.  You see, I never liked the cheap lumpy substitutes I was exposed to in the past.  But YOU, smooth and delicious Bel Gioioso Ricotta con Latte from Wegman's, YOU are delicious.  Thank you for allowing me to make this giant dish of lasagna to share with my family (at least the ones who will eat things with melty cheese).  I promise to continue to make you part of my meal plan, and to extol your greatness to anyone who will listen.  And if I ever make it back to the Dream Cafe, I most definitely WILL order the Cloud Cakes.  You are nothing like Cottage Cheese.

Your friend and fan,
Tara

PS.  And like almost everything else, you taste better when eaten on the front porch. Recipe below.

Lasagna on the Porch with Kev

Aaaaah, yeah.

Mommy Loves LASAGNA!

Layer the following ingredients in a baking dish, cover with foil, and bake at 400 degrees for about an hour.  Then remove foil and continue to cook until the cheese on top is all bubbly.  You can use the broiler for this if the lasagna is heated through. Yep.

1. Kev's Sauce  (follow this link to the recipe)
2.  Cooked lasagna noodles (I used fresh Wegman's noodles)
3.  More sauce
4.  Cooked ground Italian turkey sausage
5.  Bel Gioioso Ricotta con Latte
6.  Shredded mozzarella cheese
7.  Grated parmesan cheese
Repeat from number 2 in as many layers as you want.  Leave out the ricotta on the top layer, but use lots of mozzarella and parmesan, and sprinkle on a little dried oregano if you want.  Bake according to directions above.  Let it sit for several minutes before cutting.  It's even better left over.  Next time I will make two and freeze one for later.

Tuesday, March 6, 2012

Cold Cold Monday

Potato Soup doesn't photograph well, but it tastes really good.
Yesterday it was cold again.  In fact, it snowed most of the morning.  So, since we are supposed to be getting a significant warm-up tomorrow, I figured this might be my last opportunity to make soup.  I decided on potato.

Daphne asked me what was for dinner.  I said potato soup.  Her head hung low.  "But MOM. I don't LIKE potato soup." And she slunk away sadly.

A little while later, we were playing and I told her it was time for me to go start on dinner.  Suddenly, she perked up and said, "Mom!  I know someone who is here and can HELP you make it!"  I looked around and guessed Quincy:

Quincy
 But she was talking about herself.  She volunteered to help, without me even asking.  A good sign.

So, we started on the soup.  I let her wash the potatoes while I cut up the carrots.  Then, when we got everything going in the dutch oven, I asked her, "So, are you going to eat this soup since you're helping me make it?"  "Of course!" she said.  Can I get a HECK YEAH!

And so, I sent her off to play while the soup cooked.  And while it cooked, I stewed.  I had a moral dilemma.  You see, at the end of the cooking time, when the potatoes are all nice and tender, a nice big handful of cheddar cheese is added to the soup.  To melt.  And that means Melty Cheese, and THAT means Daphne's Kryptonite.  I began to grate the cheese.  "For me and Daddy to put on top," I told her.  "Promise you won't put any on mine," she said.  "I promise I won't put any on top of yours," I said.  And when she wasn't looking, I added the cheese.  Oh, the guilt. 

But here's the thing.  She ATE it and she LIKED it.  But I feel like the world's worst mother because I promised I'd never lie to her about food.  And I guess I didn't lie...I just didn't tell the whole truth.

I'm going to have to tell her the whole truth.  Maybe Thursday.  Because on Wednesday, we're having the left-overs.  She is going to be so mad at me.  I don't blame her.

So, Future Daphne, when you grow up and read this, I'm sorry for not telling you about the cheese.  I really am.  But you liked this soup.  I hope you will forgive me.

Recipe below.  Garnish with shredded cheddar cheese and serve with good crusty bread.

Potato Soup

 Ingredients:
  • 6 tablespoons butter
  • 2 cloves garlic, minced
  • 2 small ham steaks, cut into small cubes
  • 1/2 cup all-purpose flour
  • 4 cups chicken broth
  • 4 cups diced peeled white potatoes
  • freshly ground black pepper, to taste
  • 2 cups half-and-half or whole milk
  • 1 cup shredded sharp Cheddar cheese (Shhhhhhhh)
  • salt, to taste

Directions:

Heat butter in a large saucepan over medium-low heat. Add garlic and country ham. Sauté, stirring frequently, until ham starts to brown. Add flour and stir until well blended. Add the chicken broth and stir over medium heat until thickened and bubbly. Add potatoes; bring to a simmer. Reduce heat to medium-low, cover, and simmer until potatoes are tender, about 20 minutes. Add pepper, to taste. Add half-and-half or milk, and cheese; stir until cheese is melted. Taste and add salt if necessary.

Monday, February 27, 2012

Accidentally Stew


Using a recipe as a guide is a good thing to be able to do.  That way, you can tailor things to the way you like them, substitute ingredients, change it up a little.  I never ever used to be able to do that, as I've discussed here before.  Back in the day, I would follow recipes exactly as written.  Sometimes, this would work out for me, sometimes not.  As I got more confident in the kitchen, I was more willing to experiment a little, and change recipes to suit my family's tastes.  Good, right?

But yesterday, I got cocky.

You see, we were having a little hootenanny, and I wanted to get something in the slow cooker so that when everyone left, dinner would be ready.  Kev found a slow-cooked minestrone recipe in the Wegman's magazine.  It got great reviews, and looked really good and easy.  So I decided to use it as a guide and make a few little changes.  For example, I didn't want to get the plastic bag of pre-cut  veggies, so I got some carrots, celery, garlic, and an onion, and chopped them up myself.  I also don't like diced tomatoes, so I left those out.  Instead of Wegman's Italian tomato sauce, I used Hunt's plain tomato sauce (the big can), and added basil and oregano, and salt and pepper for seasoning, and I added a couple tablespoons of tomato paste.  And just for fun, I added some corn, cut off the cob, when I added the garbanzo beans and pasta.

And that's when things went wrong.  I forgot to consult my "guide" when it was time to add the pasta, and instead of 1/2 cup, I let Daphne pour in the whole box.  Yep. The whole box. Probably at least 2 cups of pasta, maybe more.

When I went back to check on things, I was shocked to find a giant pot of minestrone STEW.  There was barely any liquid left at all.  I am proud to say I did not panic.  I added a can of beef stock and about a cup of water, and adjusted the seasoning. This helped a little, but it was still far from being soupy.  Live and learn.

The good news is, I like stew.  It was still really really tasty.  Just very ditalini-intensive. Daphne helped make it, which was fun, and she got a couple of points toward her next New Food Chart goal (still undetermined) for trying minestrone and garbanzo beans.  Kev really liked it too.  And we had so much that he took some to lunch today, I froze a bunch of it, and we still have enough for leftovers tomorrow.  In spite of my huge mistake,  things ended well.  Yay!

There it is.  Sort of like Gourmet Spaghetti-o's. 


So, here is the original recipe, below.  I recommend it highly.  If you don't have a Wegman's, you'll have to work around their prepared products in the ingredients list.  You can use my changes above, or do your own thing.  But I don't recommend using a whole box of pasta.

Wegman's Slow-Cooked Beef Minestrone


Ingredients:
1 pkg (about 1.6 lbs) Boneless Beef Chuck Roast, cut into 1-inch cubes  (I used stew meat)
Wegmans Pan Searing Flour  (I skipped this)
2 Tbsp Wegmans Pure Olive Oil
1 pkg (16 oz) Food You Feel Good About Cleaned & Cut Minestrone Soup Vegetables  (I chopped my own - onion, celery, carrots, garlic)
Salt and pepper 
1 carton (32 oz) Food You Feel Good About Beef Culinary Stock  (I used Swanson's)
1 can (14.5 oz) Wegmans Italian-Style Diced Tomatoes  (I skipped this too)
1 pkg (24 oz) Italian Classics Seasoned Tomato Sauce (Prepared Foods)  (I used plain Hunt's sauce, plus basil and oregano to season the soup)
1/2 cup dry Italian Classics Ditalini Soup Pasta  (um...oops.)
1 can (15.5 oz) Italian Classics Garbanzo Beans, drained and rinsed 
(I added corn cut off the cob)
1 pkg (6 oz) Food You Feel Good About Baby Spinach  ( I used regular spinach) 

Directions:
  1. Dust beef with pan-searing flour; pat off excess.
     
  2. Heat oil in large braising pan on MEDIUM-HIGH until oil faintly smokes. Add beef; sear 10 min until all sides are paper-bag brown.
     
  3. Transfer beef to slow cooker; don't discard pan drippings. Add vegetables to pan with beef drippings; season with salt and pepper. Cook, stirring, 3 min; add to slow cooker.
     
  4. Add stock, tomatoes, and sauce to slow cooker. Cover, cook 4 1/2-6 hours on HIGH or 8-10 hours on LOW.
      
  5. Add dry pasta and beans 30 minutes before end of cooking on HIGH (45 minutes before end of cooking on LOW).
     
  6. Add spinach to slow cooker; stir to blend well. Allow spinach to lightly wilt, about 2 min.

Tuesday, February 21, 2012

Twenty Points

We are so proud of Daphne for trying twenty new foods so far in 2012.  She finally got the 20 points she needed to watch Star Wars!  So on Saturday, we had Family Star Wars Day to celebrate, complete with Princess Leia hair.

 In the morning, we tried the star fruit.  Nobody really liked it, but it counted towards Daphne's NEXT twenty points.  Not sure what her reward will be this time.  Empire Strikes Back, maybe?

Anyway, later in the afternoon, we had a late lunch and watched the movie.  There were Ham Solo sandwiches, Vader Tots (or perhaps Darth Taters...no one can agree on this), and baked Zuke Skywalker chips for lunch.


We also had home-made Wookies and Cream ice cream (vanilla with smashed up oreos) for dessert.  There are no photos because we were too busy eating it to take pictures.  It was delicious.

Daphne loved watching the movie, although I don't think she really understood all of it.  She wasn't freaked out by the sand-people like I was as a kid, but she was a little distraught about the whole battle between Obi-Wan and Darth Vader.  After the movie, we took a long LONG family walk to distract her crazy little  Daphne brain so she wouldn't be obsessing about Star Wars with a million questions at bedtime.  It worked!

The Star Wars portion of our weekend concluded on Sunday with some Princess Leia cinnamon rolls for breakfast.  I don't really have any recipes to share.  The cinnamon rolls were store-bought, the tots were frozen, and the sandwiches were sandwiches.  I did make the zucchini chips, but they weren't very good, and I'll probably try a different method next time.  And the ice cream was just the simple vanilla recipe that came with the ice cream maker, with some smashed oreos added at the end.  The fun part was coming up with the food ideas.  I hope she picks Empire Strikes Back for her next reward.  There might just be some Boba Fett-uccine in our future!

Tuesday, February 14, 2012

Valentine Ravioli!


Happy Valentine's Day.  As I type this, I have Butter Chicken in my slow cooker and Nutella Brownies in the oven.  There is a lot of love going on in my kitchen right now.  I'm looking forward to dinner.  But we also had a nice pre-Valentine's Day family dinner on Sunday.  Everyone pitched in, and we made mushroom ravioli.

Kev and I went out to dinner at Palio a couple of weeks ago, and I got some really good mushroom raviolis.  I've been wanting to make pasta lately, so I looked around on the internet and found a couple of mushroom filling recipes which I used as guides.  One thing I really wanted to do was copy how the restaurant sprinkled crumbled up amaretti cookies on top of the pasta.  It was a really nice touch.  It added a little texture and a little sweetness.  So, I went to Wegman's, where I have purchased amaretti cookies before, and - no cookies.  I looked all over town - Super Target, Giant, Safeway - no cookies.  So, I gave up on that idea, but that's OK.  The ravioli must go on.

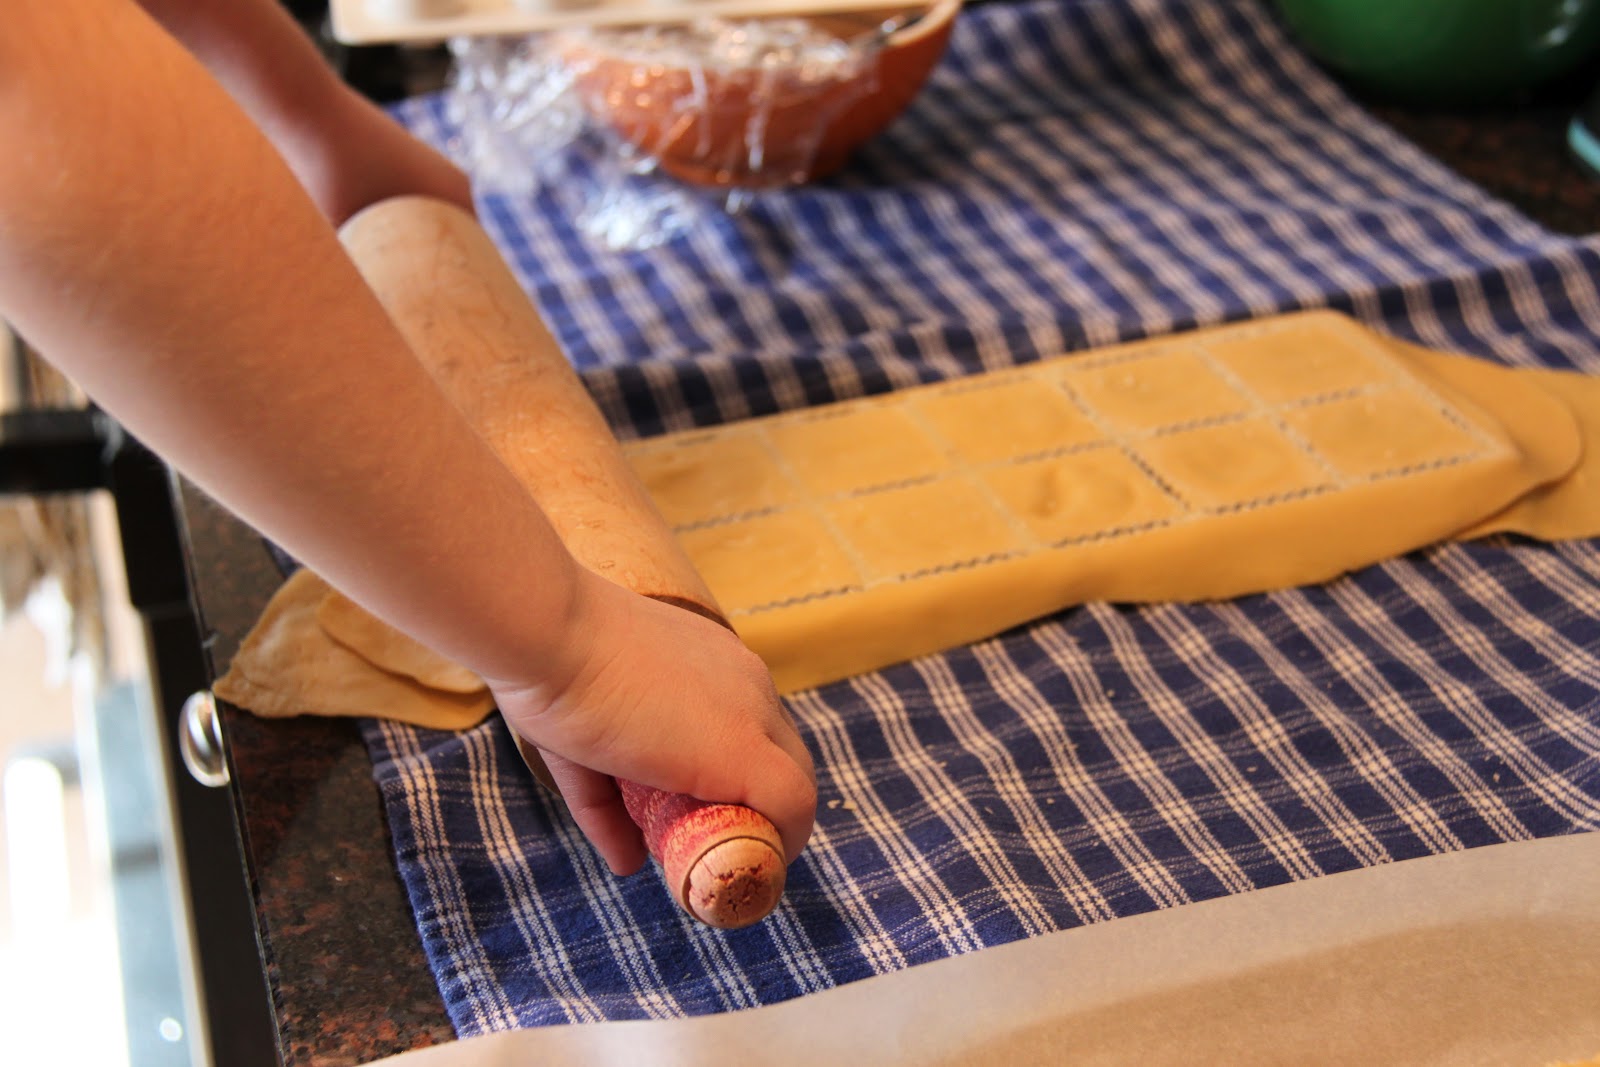
So, Sunday morning, I made the filling.  Then, I made some pasta sheets while Kev and Daphne filled them.  I can't say enough good things about the KitchenAid pasta attachment and the Norpro ravioli maker.  Both are so easy and fun to use.  Daphne can almost do the ravioli maker by herself:


Aaah...the army of ravioli is complete:


Later that afternoon, when I ran out to Safeway on my final quest for cookies, THIS happened:


I came home from the store, and when Daphne heard me, she came running downstairs all dressed up, ready for a fancy dinner.  This was all her idea.  She got herself dressed and put clips in her own hair.  I love that kid.

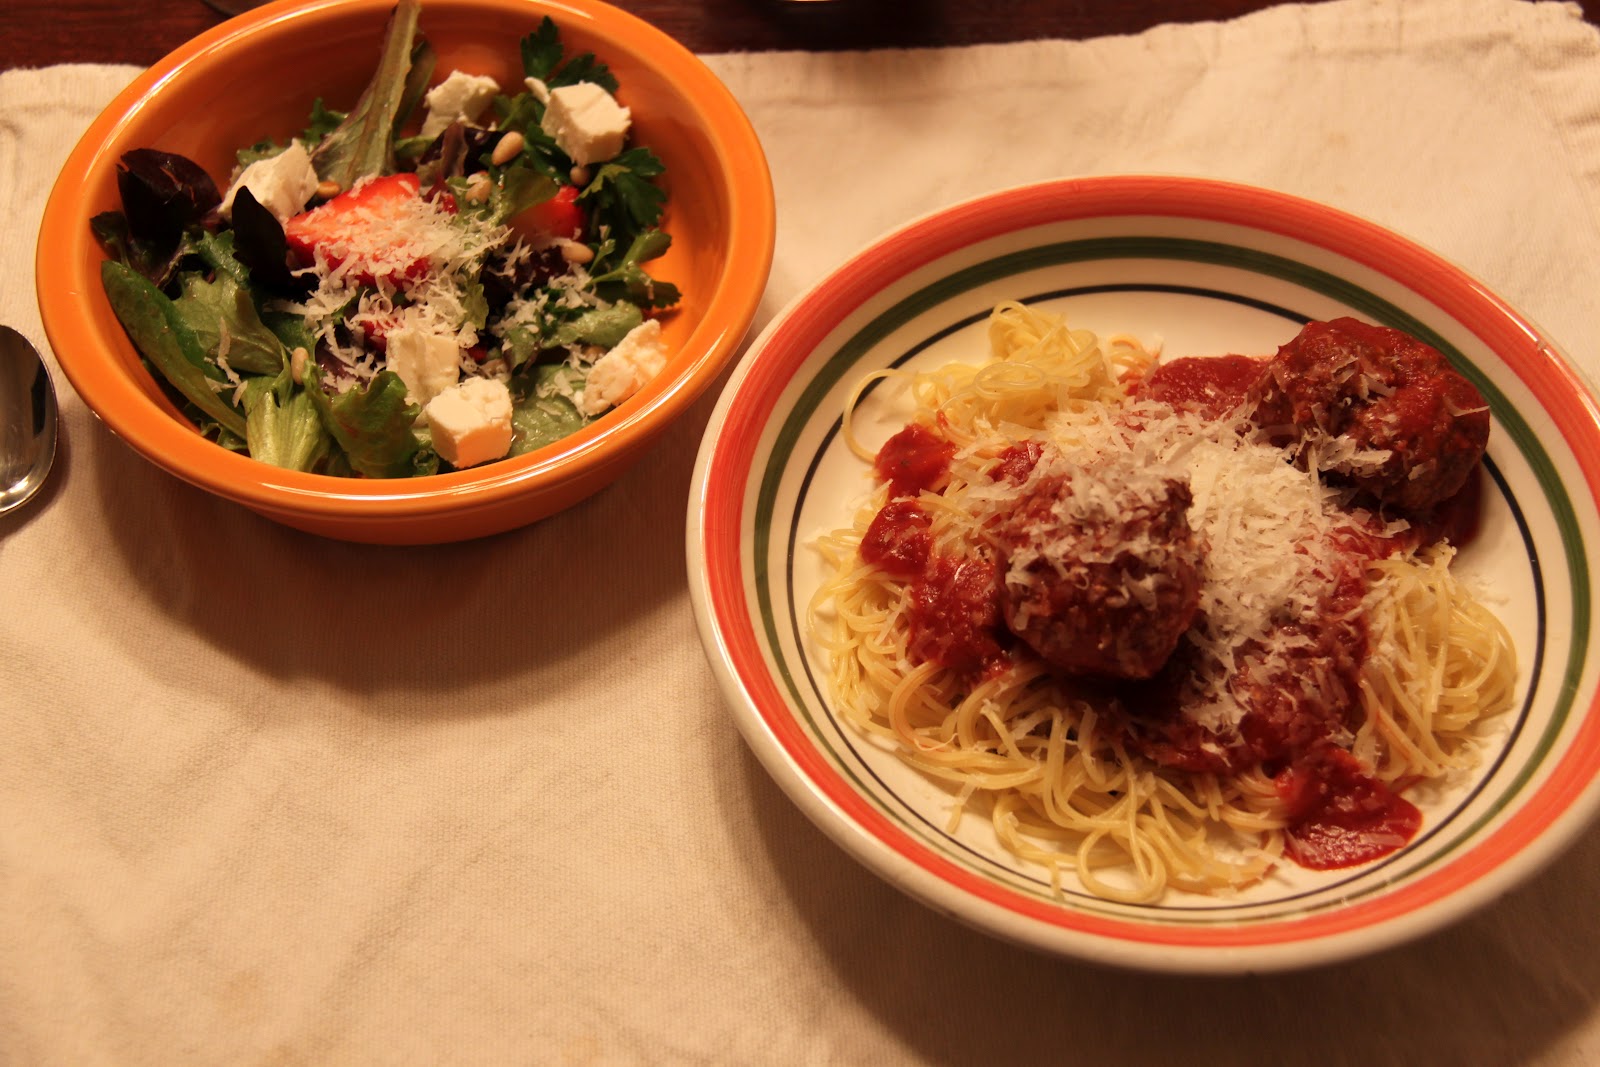
Eventually, dinner was served.  Since there were no cookies, I toasted some pecans to sprinkle on top.  I also made a sage butter cream sauce that I am proud to say I made up all by myself without a recipe.  The Force was with me.

The pasta, filling, and sauce all got rave reviews from Kev, who said it was better than the restaurant.  I liked it too and was sad when I took my last bite (22 raviolis are in the freezer for another day, though...woohoo!).  Daphne really wanted to like it, but didn't.  The filling was mushy and there was cheese.  Not really her thing.  I didn't expect her to like it, but I am so proud of her for trying it without any battling or complaining whatsoever.  In fact, for tasting the ravioli, she got her 20th Star Wars point, and finally earned the privilege of watching Star Wars.  Next Saturday, we're having Family Star Wars day, which will include Star Wars themed foods, so stay tuned for that.


Below are recipes for the mushroom filling and sauce.  Follow the KitchenAid directions or your preferred method for making the fresh pasta, or use wanton wrappers and seal them with water (you can google how to do that if you haven't done it before).  Top with lots of freshly grated parmesan, toasted pecans (or amaretti cookie crumbs), and serve with a nice salad.  Yum.

Mushroom Ravioli Filling

Ingredients:

Mushrooms (I used one pint-sized container each of button, cremini, and shitake mushooms) thickly sliced or quartered
2 or 3 cloves of garlic, chopped
1/4 cup butter
1 Tbsp olive oil
salt
pepper
1/4 tsp onion powder
1/4 tsp garlic powder
2 Tbsp beef broth 
1 cup ricotta cheese
1/2 cup parmesan cheese (freshly grated if possible)


Directions:

Melt butter over medium heat and add olive oil.
Add mushrooms and saute, stirring occasionally, until they release their juices and the pan is no longer sort of all watery.  This takes several minutes.  Be patient.
Season with salt, pepper,  onion powder and garlic powder.
Add garlic and cook for about 30 seconds.
Add beef broth and let it reduce.
Set mushrooms aside to cool.
Add ricotta, parmesan, and cooled mushrooms to food processor and blend until smooth. (Or if you like the filling to have a little texture, don't blend as long).
Taste and season as needed.
Use mixture to fill pasta according to your preferred method ( I used my Norpro press).
Let pasta dry for about an hour before cooking, or freeze in a single layer.
This made 44 raviolis.


Sage Butter Cream Sauce

Ingredients:

1/4 cup butter
1/4 cup AP flour
dried sage
salt
pepper
about 1 1/2 cups chicken stock 
heavy cream
nutmeg

Directions:

Melt butter over medium heat.
Add flour and stir constantly, once combined, cook for a minute or two
Add chicken stock,  stirring constantly until combined and there are no lumps of flour, bring to a simmer to thicken
Season with sage, salt, and pepper to taste
Add 1/4 or 1/2 cup heavy cream (whatever you like). 
Taste and re-season as needed.  Warm through, but don't let it boil.
Grate some nutmeg - just a little - into the sauce and stir to combine.

Add to ravioli, top with toasted pecans (or crumbled amaretti cookies if you can find them) and freshly grated parmesan cheese,  and enjoy!
 

Monday, February 13, 2012

Time to Make Sauce


This weekend, I decided it was time to start teaching Daphne how to make her favorite thing:  Spaghetti and Meatballs. I already had some meatballs in the freezer from last time we had it, so we started with learning the sauce.  She was already in a groove from her cooking class at Wegman's earlier that day, and she had the perfect hat!  So, things went pretty smoothly.

We are a two-sauce family.  My mom's meat sauce is awesome for plain pasta and I'm hoping she will teach it to Daphne. But for meatballs, we make a smooth tomato sauce with mushrooms.  Kev taught me this one, so if you're reading this, you are being let in on one of his Top Secret Kev Recipes.  So, don't tell anybody.  Actually , it's not so much a recipe as it is a guide.  When he first showed me how to make it, I was not very fond of cooking and I was definitely not confident in the kitchen.  I wanted to know the EXACT amounts of things and the EXACT steps.  If you have a recipe, then you can blame the recipe if the food turns out crappy.  But if you're winging it and it's bad, it's all on you. WAY too much pressure.

I am happy to report that 10 years ( and hours and hours of Food Network shows) later, I am not quite as inflexible as I was then, and I am definitely more confident when I cook.  While Daphne and I were making the sauce, I was telling her that you have to season it, and taste it, and see what it needs, and season it again.  Kev had a good laugh when he heard that, remembering all the kitchen panic of days gone by- "But it doesn't say how MUCH oregano!"


Above, we were having a little lesson about salt.  I was telling Daphne not to go too crazy (she loves grinding the salt) because you can always add more, but you can't take it out once it's in there.  Last night, I was watching "Worst Cooks in America," and this poor guy poured a whole bottle of soy sauce into a stir fry he was making for Crazy Ann Burrell.  Good grief.  She refused to even taste it.  I like that show.  Compared to the people on there, I think I'm in pretty good shape in the kitchen.


Our sauce turned out good and Daphne was pretty proud of it.  And we have a LOT left, so we're making baked ziti tonight.  I love left-overs.


Below, is the basic idea for making the sauce.  Serve with your favorite meatballs, some pasta, lots of freshly grated parmesan, and a nice salad.  And make sure you have plenty of napkins handy.

Kev's Sauce

Ingredients:

Olive Oil
Mushrooms, sliced
Garlic, minced
Salt
Pepper
Oregano
Basil
Bay leaf
2 large cans of tomato puree
tomato paste
red wine
sugar

Directions:

Heat a couple tablespoons, maybe a little more than that, of olive oil in a dutch oven.  Add the mushrooms and cook until slightly softened.  Season with salt, basil, and oregano, add as much or as little garlic as you like (I like a lot) and continue to cook for about 30 seconds.  Add the tomato puree and about 2 tablespoons of the tomato paste.  Add some sugar to cut the acidity of the tomato (maybe not quite a quarter of a cup), and about a cup of good red wine.  Stir it all together, throw in a bay leaf, cover and simmer for a nice long time, maybe two hours or so.  Check the seasoning now and then.  Add salt if it's too sweet, add sugar if it's too acidic, add herbs if it's too bland, add wine if it's too thick.  You can add black pepper too, if you want.  Use the Force.  You can do it.  Trust me.  If I can do it, you can do it.